Merry Day After Boxing Day!
Have you had a look at the boxing day sales yet? I've ordered a few bits and bobs and so will post about them very soon!
My Christmas Day Mani was a bit of a quickie one, we were doing the cooking and prep etc for 11 or so people and so it was very, very busy!
I have made this into a wee tutorial type post too, since it's Christmas and all that jazz!
I have a multitude of different pictures too as my iPhone storage is kinda full and I still haven't figured out how to work my coolpix that I got for my birthday in July!
This mani was pretty simple, I was rather rushed and this was the only thing I could think of that didn't require too much effort (or thought!) on Christmas Day.
Here's the tools I went for: a selection of polishes, a topcoat, thread, scissors, dotting tool and a plastic tray thing for splodging my polish into.
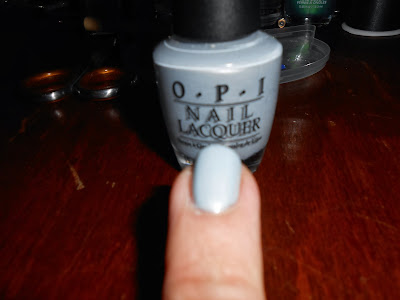
After I applied my basecoat, I applied two coats of OPI 'I vant to be a-lone star, I love this for this particular mani as it is a frosty pale blue with a silver shimmer. Some of my nails needed a third coat as there were some patchy bits.
Before adding the second coat, I cut the thread to size in preparation for the next step.
After adding the second (and third) coats of polish, I applied the thread to my nails before the polish was dry. you can apply it in anyway you want, I quite like the loop on my pointer finger!
Use tweezers or the scissors to gently push the thread into the polish so that it adheres to the nail.
I then applied a coat of topcoat just to seal it all in.
One thing I did forget which would have been really handy for while doing my dots would have been a cotton pad with nail polish remover on it to wipe my dotting tool on after each colour.
I then splodged my polish into the plastic tray, I started with yellow and did all the yellow dots on every finger before moving onto all the blue dots, then all the red dots and then all the green.
The yellow I used was the Barry M Limited Edition Yellow I posted about here.
The blue I used was Nails Inc. 'Baker Street' quite possibly the bestest blue colour in the world ever!! I posted about it here too.
The red I used was the Mavala Rouge Rubis one I used last week, here, is a lovely little red. I can't believe I have owned this for a whole year before using this, it really is a lovely, sparkly red and perfect for Christmas!
The green was a cheeky little poundland purchase but I really like the metallic effect. It is a Sally Hansen Ultra HD in shade 'Resolution'. I have only ever worn this on my toes and although the colour is pretty lovely, the formula is quite thin and needs quite a few coats for opacity.
I waited (not so) patiently for the polish to dry, trimmed the thread and then topcoated again just to keep it looking nice and shiny throughout christmas dinner!
This design could have so many variations, you could do a darker base or a glittery base, switch up the colour of the thread and silver and gold dots would make awesome fairy lights!
Let me know if you give these a try, these would work well for New Years Nails too!
Hugs,
Jodi


No comments:
Post a Comment